

In
the 1960’s, Queensland Railways had four drawgear classifications on their
rollingstock fleet. Auto (D1), Premium (D2) hooks on the steel rollingstock
built in the 60’s, Select (D3) hooks on steel wagons built in the 50’s and
newer wooden wagons, and ordinary (D4) hooks on the older wagons and all four
wheeled wagons. By the early 1990’s it was all auto (D 1) couplings and the buffers
were gone. The era I model had all classes including transition coupling to
couple hooks with auto couplings.

At
first on my wagon fleet I tried to have different class/standards of couplings as
the prototype, the method in my madness was to marshal trains as per QR instructions.
Stronger drawgear to the front and not so strong on the rear, maybe have the
same end results as the prototype if the instructions were not followed.


I
was not over concerned if the couplings did not centre, the prototype do not
centre, it’s up to the Shunter to line up the couplings. Most did not have
grease on the slide plate and often required two hands a lot of grunt. The
height also varied considerably, loaded wagons with empty wagons, new wheels
with last turning could alter the height quite a bit. Provided the jaw hit the knuckle
tongue on the other coupling and the coupling locked, all was good. 1620 DEL’s
were noted for their low coupling, often you would stop short and close one jaw.
Some times it was a two man job, one shunter would lift the coupling and the
other would slide a dog spike under the stem. The good book suggests after coupling auto
coupling they should be tested by stretching them, the locking block in bottom pin couplers often did
not drop.
All
was good on the layout until I started making up operations sessions requiring
a number of shunting moves. In big strings of wagons the # 711 did not like being
pulled and pushed about and would let go. Often in hard to reach locations,
plus it added extra time into the shunt. Maybe I had given them a flogging over
the years. Yes, the method in my madness was working to good. The scale whisker
coupling have been out for some time and are great, they are better than sliced
bread. I use the # 153 short centerset on wagons without buffer. # 158 medium
centerset subject to buffer size and # 156 long centerset for bigger buffers. In
each application, I use the shortest shank coupling for the job. When pushing
back, the long shank couplings swing to one side and on curves could cause
wagons to derail. I have been using them on all my new rollingstock and they
work great and look awesome. I have found them easy to fit. Over the last few
years I have change my fixing methods a bit. On open wagons without a load and platform
wagons I make the coupling box as part of the floor.
At
first I was using styrene for all of the compounds including the coupler pivot.
Thinking that this may wear over time the next lot of wagons I included a brass
bush made from 1/8” brass tube. The last lot I made I used a 1/8” brass rod (3.1
mm) in which I drilled a 1 mm hole in the centre using the lathe. The rod was
cut down to the same thickness as the coupler shaft. A 1 mm brass rod was used
to mount the pivot block. This was done on the PCUY wagons which you can find
on the blog. http://westgateswr.blogspot.com/2019/01/pcuy-wagons.html


Recently
I made some grain wagons, the wagons were fitted with traps and the floor was
not visible. I fixed the couplings with a self-tapping screw, much the same size
as the coupling pivot hole. A washer was added to provide extra support for the
bottom of the coupling. Check the size, it may foul the wheels if to close. With
styrene made wagons the self-tapping screws can form a bubble around the fixing
hole, this will need to be removed with a file. The mounting hole can be some
what large also.


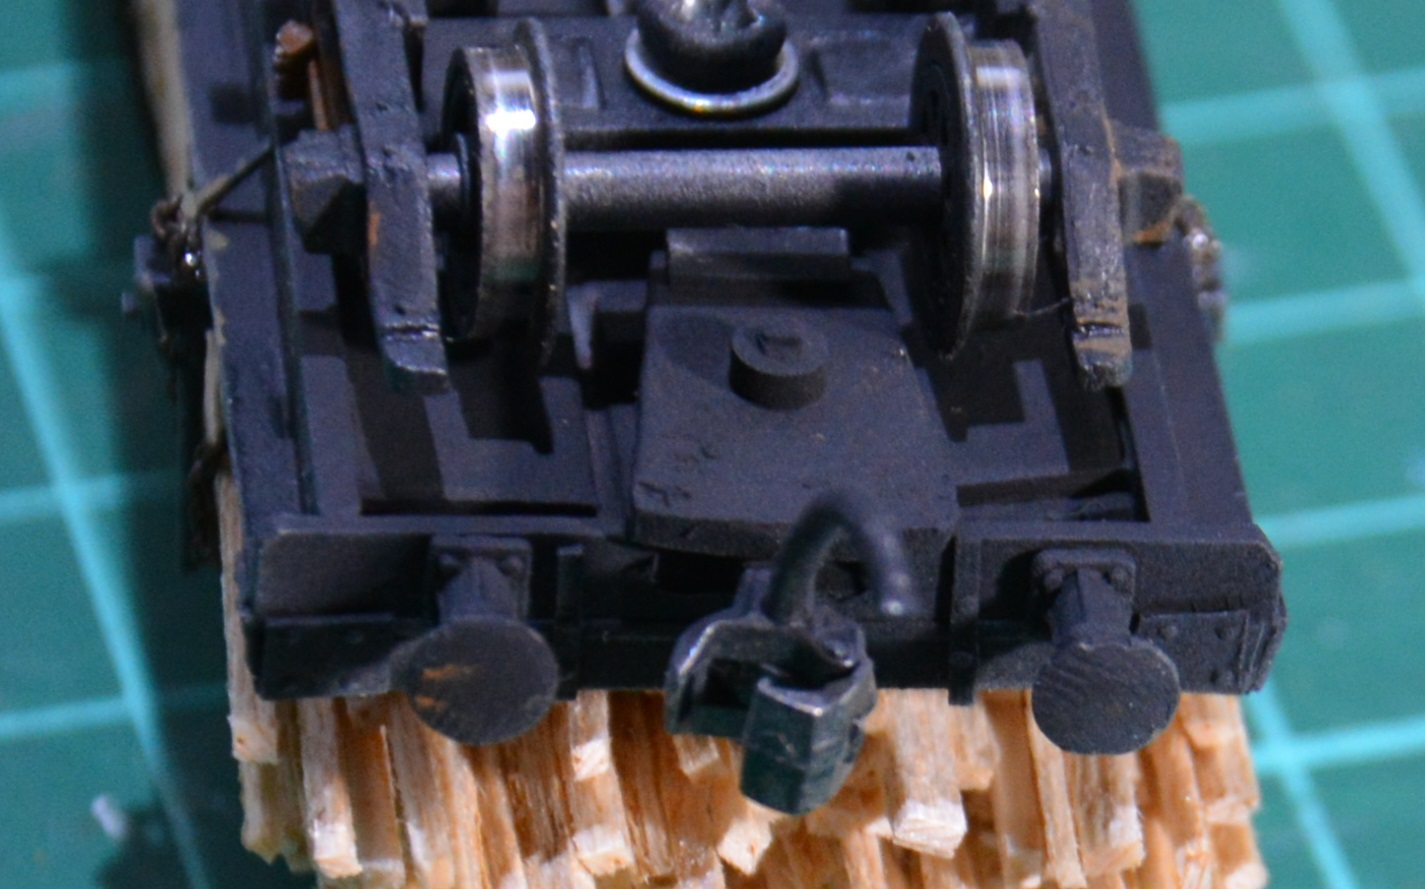
This
coupling is to far out from the headstock, I was using the fixing point from a
previous coupling.


711 Coupling


Using a 2 mm screw
All
my four wheeled hopper wagons are Peco TT underframes, these were available in
the seventies. At first I ran them in blocks of five using dummy knuckles. A
small Kadee rounded box was used at the end of each block, this didn’t look all
that great and did not work all that good. Moving into operations I wanted to
be able to change the orders for each day, to do this working couplings were
required on all wagons. After some thinking, a channel was cut into the
headstock with a dermal cutter to take the coupling shank. Short shank
couplings # 153 was used with a brass plate top and bottom to hold the
underframe together and to mount the coupling. Fixing the coupling was the same
as above with the 2 mm screw and a bass 1/8” bush. Yes, a little bit of a compromise, once painted they don’t look to bad and they fit the
bill until something better comes along.


The
QR coupler height is 2’ 8 “(9.3 mm for the modeller), for mounting I use the casting
mould line in the centre of the knuckle for this measurement. I made a coupler
gauge to ensure all wagons have the same height coupling. The coupler release pin
is raised a little to ensure it don’t catch on points. So buffer do not buffer
lock on curves and points I try to mount the back of the coupler pocket in line
with the front of the buffer. I use Peco track and standard points with a 24
inch radius on the turn out. The curve points have an 18 inch radius turnout.
Placement of the coupler should be checked if running on less than 24 inch
radius curves. This may not look prototypical with a large gap between wagons,
our models run on much small radius curves than our rail networks use and do
not have springs in the buffers. The modern era without buffer it is more achievable,
but the slack in model couplings is greater than the prototype draft box. On
the prototype, a train of 40 wagons will have equal to one wagon of slack
across the draft packs.

Trust
you find this helpful in your modelling.
A very interesting read. Good information for all
ReplyDeleteMany Thanks, your comments are much appreciated. Arthur
Deleteyour blog was very informative for all.
ReplyDeleteMany Thanks, your comments are much appreciated. Arthur
DeleteMany Thanks, your comments are much appreciated. Arthur
ReplyDeleteMany Thanks, your comments are much appreciated. Arthur
Delete