Modelling an era after the mid 1960’s, transporting ISO containers can be part of your operations. At first it may have been just an odd wagon or two on the train. By the late 1980’s whole trains of containers were running. A lot of us older modellers don’t have much time for this type of operations. Some see them as a train load of boxes and not very interesting.
Over time the size of the boxes changed, mainly in height. Most were owned by various private companies; the boxes were in company colours with ownership marking. As lifting equipment was developed the weight increased and other types of containers were being built. Many were for specific traffic types, just like the wagons of yester years and more. Having spent the last 12 years of my career working with container on the rail network, it was only time before they start appearing on my layout. I guess I have developed a new appreciation for this type of traffic and what it can offer the modeller. Heaps of variation to the point where only one set of wagons are needed and a box of containers. Just like the prototype, each train is different as the load changes each trip. The same container can go up and down the coast many times on different wagons in different locations on the wagon and trains. And then there is the different types of containers and their loads.
One
of these types of containers is the “Flat Rack” container, there is various
types to carry different loads. Some are suitable for double stacking and other
can carry heavy loads. Some have headstocks, other will be fitted with gates, and
tarps will cover some loads. Their application will change from company to
company with some companies having their own fleet. Some will be off ships from
overseas ports and others will be interstate or local traffic on the same
network. Loading and securing methods may also be differ between
companies.
With container traffic on the layout there is no need to have a siding to deliver the load. So, any load can be carried on your trains. Let’s look at some prototype photos to see what we can model. Or just thing of an industry and the products they use or manufacture and you have a load to add to your container.
20 ft. K & S Container loaded with Reo rod. The bundle is tie together with wire, steel strapping is used to secure the bundles to the container. Steel strapping on rail is considered as a secondary means of securing, 5 ton web straps have been used as the primary method of securing. Each row is separated by 4” x 4” dunnage to make unloading much easier.
20 ft ISO bulk head container with bin/hopper load. The ends can be
folded down flat when empty for easy storage.
20 ft. container loaded with steel.
20 ft Half height bulk head container with coil steel load covered with
company tarpaulins
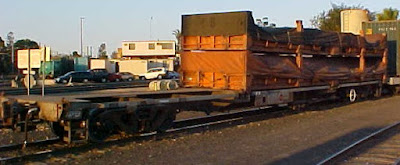
Empty nested flat racks being returning to sending location, end and side
gates with tarps and dunnage is stack on top and covered with a tarp. This
arrangement is a considered as a loose load and must exceed 8’ 6”in
height.
Container of a ship, securing needs to be assessed for rail.
Newsprint secured with shrink wrap.
Sugar mill crusher
QRX gated container with timber load.
QRX gated container covered with a tarp.
Half height gated containers.
Bulk head containers in pineapple traffic (Rockhampton to Golden Circle).
Loco bogie
40 ft Flat
Racks
Weld mesh, note securing for the bottom layer
Packs of weld mesh
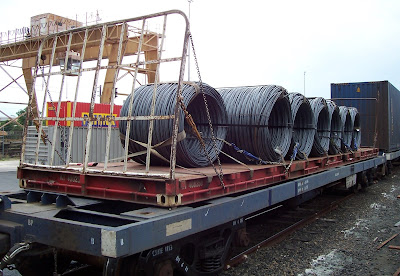
Coiled wire rolls
Poly pipe with side stanchions.
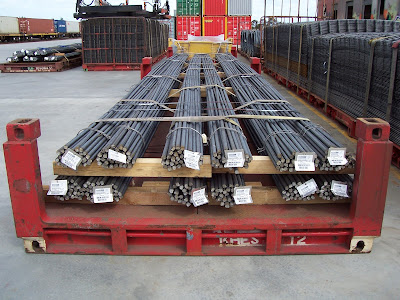
Reo bar in bundles
A load that requires adjusting before continuing to its destination.
Load secured with 5 t web straps.
A load of reo bar in various lengths. Short lengths are sandwiched
between the longer lengths. Load secured with chains and dogs.
Double stacking of half height steel containers
These containers are about 26 tons each which is under the carrying
capacity of the wagon, but weight is mostly on one bogie which makes the wagon
overloaded. Heavy loads need to be in the centre of the wagon between the
bogies. Just one issue, the wagon does not have a 40 ft central fixing
location. The containers need to transhipped onto a suitable wagon. Another
consideration for these loads is the 8 ton capacity of twistlocks.
These containers need to be self-supporting, in other words, the weight can be supported by the corner posts.
Rail Motor bogie ??
40 ft. bulkhead container fitted with stanchions for timber traffic.
Branch line container train on the Monto Branch.
Some flat racks are nested with shipping twistlocks, locking both
containers together.
40 ft. container with ends that can be extended for long loads.
This photo suggest QRX used 16 ft. gated containers.
There are various methods used to load flat racks.
Legs that fitted into centre lifting ports.
Frames with chains were using at some smaller loading locations. May not
be allowed these days, as there is a lot on movement with the container
swinging.
Moving flats racks can be a tricky business.
Models.
Most containers on the
South West Railway (Westgate SWR) have been modelled using the photos above.
RTR
and resin kits are available in both 20ft. and 40ft. Scratching building them
is a great way to learn a new skill, a frame with a top and bottom floor, add
some detail to your taste and you are done. The great part about scratch
building is you have a choice and can do something different and not available
in the hobby shops.
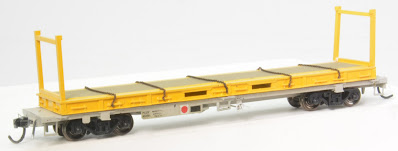
Herpa
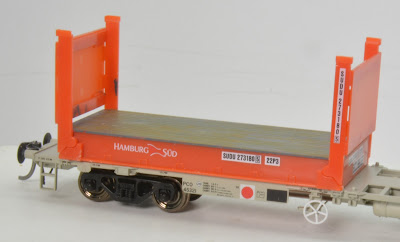
produce both a 20 ft. and 40 ft. Flat Rack with fold down ends in various
colours and company markings. The 20 ft. container are available in a 3 pack.
E-Trains (Perth) Flat Racks (etrains.com.au)
One
(1) 20ft, Container $ 16/17 subject to markings.
Pack
of 2 unpainted 20 ft. Containers $21.00
Pack
of three (3) 20ft. Containers $ 40.50.
One
(1) 40 ft. unmarked $ 10.50
One
(1) 40 Ft. $ 17/18 subject to markings.
Plus
P & P and availability.
A more realistic look can be achieved by painting the timber decks.
Vallejo acrylic Model Color was used on the floor. A couple of shades of grey were applied to the floor and finished off by dry brushing a brown.
A
heavy duty Flat Rack is available in a resin kit from CDH Models on eBay for
$15.00 posted. They also have other flat racks and K&S decals. Most of the
red containers in the prototype section above are K & S containers.
Some
modifications were made to the floor with styrene strip. This was done to build
a side gated container.
Gates were made from brass rod, drum are Tichy Train Group
The timber pack are made
from balsa, only the top tear was cut into strips.
The bundles are secured with black cotton and the load is secured to the
container using plastic shopping bags (JB Hi Fi) cut into strips.
Pipe load made from
balloon sticks. Dunnage between the rows are one above the other, likewise the
securing straps are near the dunnage.
A mix load of
steel made from styrene and wire.
Scratch build
empty containers with timber deck.
Bugger, no decals on the wagon??? Off to the workshops. Old age catching up ???
Fly screen cut for the weld mesh load.
37 ft. Flexi-van trailer was scratch build, plastic shopping bags were used for the tarpaulins. Sewing cotton was used for the securing ropes. The van is mounted on the “PC” scratch build wagon. At the time of construction, I could not find too much information on the Flexi-van trailers, thus a lot of guess work. Auscision Models are currently manufacturing a selection of trailers used on the interstate network. Transiflats and Railtainers where much the same.
Mounting containers to wagons is something that needs to work out before adding a load to the container. The prototype has various methods, corner anchor, pin locking devices fixed or removable, spigots, fixed and retractable twistlocks, auto twisted locks in a few different designs.
Before the RTR
manufactures started producing container wagons and containers I used a pin
method to fix containers to wagons. A temp plate was used to add a pin to the
floor of the container and a securing slot (small hole) on the wagon floor.
This allowed containers to be interchange from wagon to wagon, from standard
gauge wagons to QR wagons. Yes, the makeup of Interstate standard gauge trains
is much different to local QR trains, they are two very different markets, and
not all containers on the interstate trains come across to QR trains.
Of late the manufactures of RTR container wagons are fitting wagons with twistlocks and their containers have recessed slots, containers can be pressed onto the wagon deck.
The fixing slots in Herpa
containers do not fit our Aussie manufactured RTR wagons, modification is
required by enlarging the fixing slot. With 40 ft, containers, consideration is
needed in the centre of the container to fit over the 20 ft. fixing twistlocks.
Plastic shopping bag
(Hobby-One) was used for the tarp. I made the load out of styrene strip forming
a box. The top was left open and that can be seen through the tarp, bugger. The
tarp is fixed with supa glue and that can also be seen through the plastic,
some black wash did hide it a bit.
Shirring elastic from
Lincraft ($4.00) was used as chain to secure the hopper to the container. The
hopper/bin was scratch build using styrene from a photo in the prototype
section.
The wooden
crats were made using scribed styrene.
The securing straps are cut from plastic shopping bags into approx. 1 mm strips. 1mm holes were drilled in the side of the container base and the strip was passed in under the floor and glued out of sight. Tie wire was cut to length for the tensioning ratchet.
Until the mid-1990’s, QR container wagons had a loading sensing device (Height register, VTA empty/load Value, Proportional empty/load brake value) on one bogie only. To avoid skidding (flat) wheels, instructions were issued that wagons loaded with one container were to be loaded over the handbrake end. Not all wagon had a centre loading position. Wagons modified or new wagons entering service during 1990’s had load sensing on both bogies.
Trust you found the information helpful and it can assist’s you in your modelling.
Container Trains can be viewed on the layout, jump across to YouTube
Stay safe and well until the next post, the next post maybe another Guards Van ??? You can’t have too many Guards Vans, I have lost count. The other day there were 16 on the layout, plus more in the boxes under the layout.
Arthur H.
Acknowledgements.
Australian Model Railway
Association Queensland Library


.jpg)










.jpg)




Wow, what an indepth post that one was. Some great ideas to model there Arthur. Thanks for sharing.
ReplyDeleteHi Phil, Your comment is muchly appreciated. Some things on the prototype we see and don’t know why it’s done that way, and then there are other practices we don’t pick up on. It may be a bit pickie, I feel if modelling a prototype it’s important to follow prototype practices. Plus, I think it’s learning about the prototype as well. Many Thanks Arthur.
ReplyDelete