Operating your layout is a ton of fun when everything runs without issues. Dirty track and wheels have the potential to turn your day upside down with stop start running and derailments. Having clean track on your layout makes the layout more reliable and enjoyable. Over the years there has been various methods and it can be time consuming taking the shine off operating the layout.

For many years I used a track cleaning rubbers, Peco, Fleishman, and a few others. At times a fine grade wet and dry paper has been used on heavy stained areas. Reading various reports, some say track cleaning rubbers causes’ damage to the top of the rail and over time causes other issues. In short this is called the “Dry” method. This method leaves small particles of the rubber behind, a type of dust from the rubber that’s lays on the track that can find its way into mechanisms, rollingstock etc. adding additional tasks to maintaining the layout. Usually, the vacuum cleaner comes out for a run over the track. Scrubbing the track with a rubber and then waving the vacuum cleaner around can cause damage to structures near the track in the rush to complete the task. Because of this some detail has been placed away from the track or left off the layout. Having said that, from time to time it’s a good idea to run the vacuum cleaner, with care, over the layout to pick up dust that has come in from outside. I also use a soft brush on the roof of buildings and rollingstock on the layout. I usually loose a few people and small detail from the layout in doing so. And then there is the tracks in hidden areas like tunnels or out of reach etc. I found if the layout was not used regularly, the track cleaning rubber on the track was required before running trains. Track cleaning cars can help and there are many to pick from.
For the standard gauge
network on the layout I did modify a Bachmann Silver Series item # 16301 “Track
Cleaning Car Weed Sprayer Service” tank car to look Australian.

Several different models in various colours/railroads are available. Various parts were removed and others added.
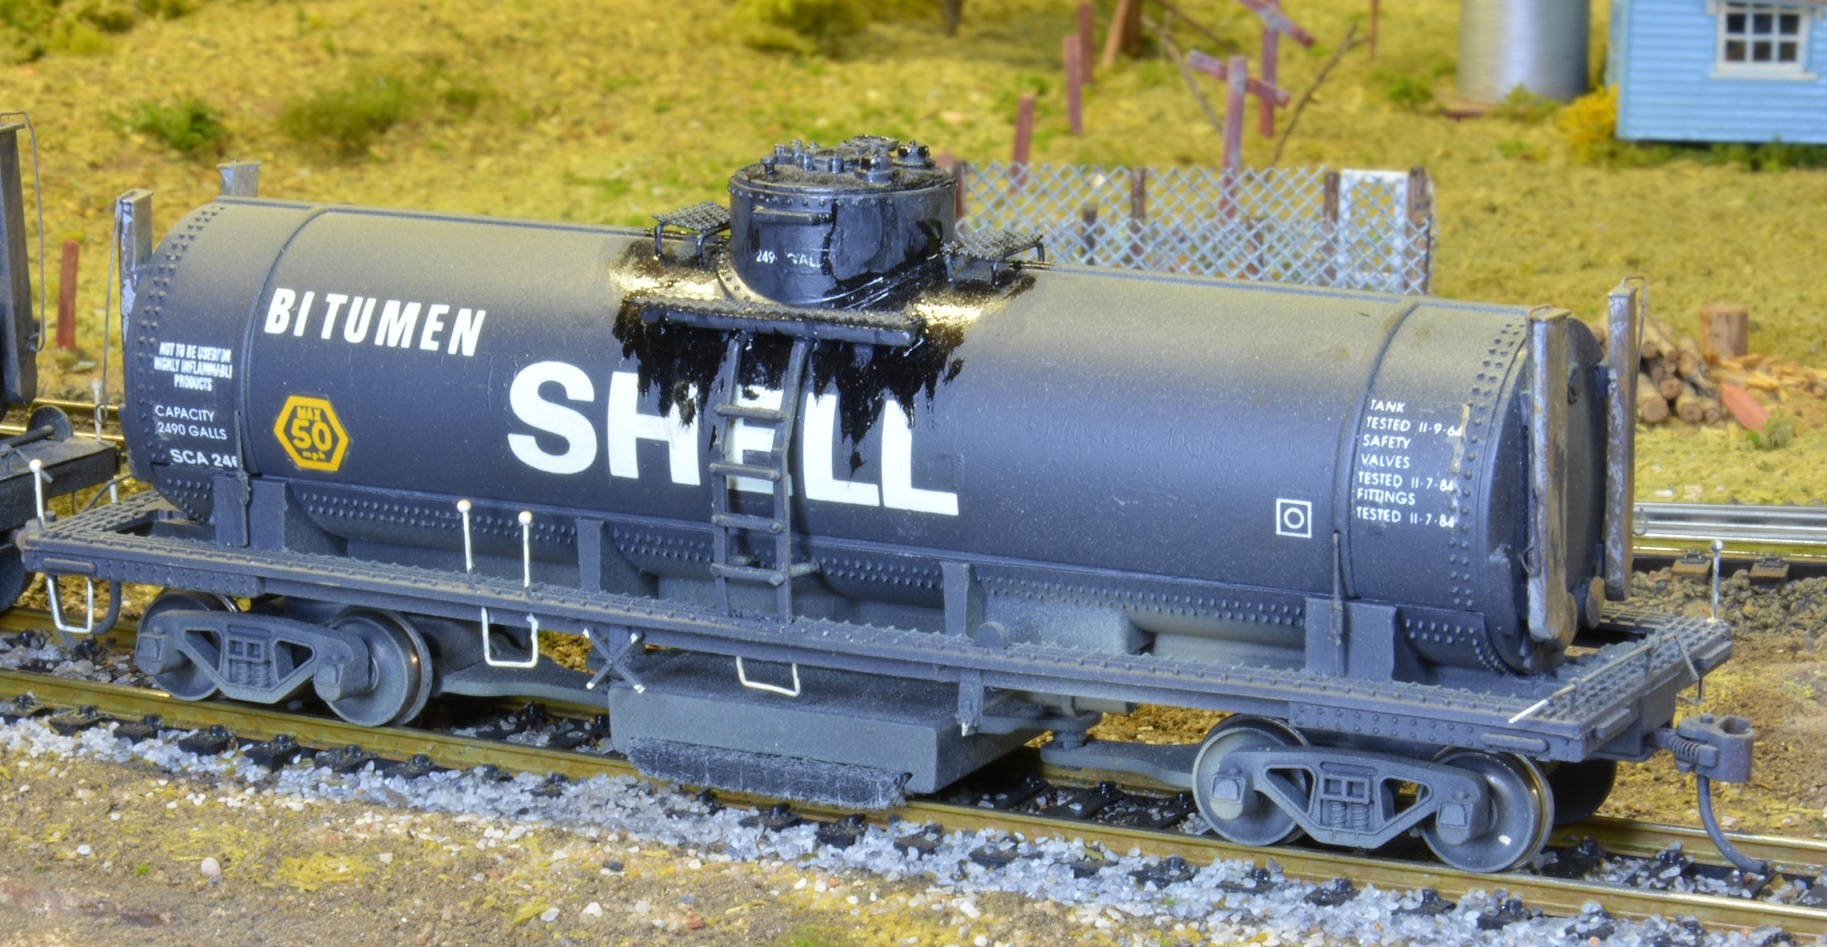
Steps, handrails, platforms, burner tubes, coupling release handles etc. painted and decals were added, a bit of weathering to make a bitumen tanker. In general, the wagon were given a NSWR flavour.
A second one (later era) was
modified for a mate, this time the underframe was also altered.


Over time the rubber did clogs up and I was able to purchase a replacement. Using the car after lengthy periods of not running I found I still have issues with some steam loco not wanting to run and a deeper clean was required.
The other way modellers have reliable running is using the “wet” method, this is adding a fluid to the rail to improve the flow of electric current between the track and the loco motor. Wahl clipper oil was popular a few years back and is still used by some modellers. To me, oil on the track may keep a shiny top, but does it help conduct power to your locos. Plus the dust factor in the layout room, oil and dust together becomes a grinding paste. Yes, I can hear you saying, oil on the track. I recall when working at the Gabba, some Cleaner would put oil on the track after the coal stage when another Cleaner (he should have been help us) was driving a loco, it was up hill back to the shed roads. Yes, there was some wheel spinning, a few words and a bit of skill (a few attempts) required from the driver to make it up into the yard. When working the QR “N” scale layout on tour in the 1980’s I found the dry method didn’t work all that well in wet weather. I used WD 40, spray it on a cloth, wipe the track with the cloth and then wipe the track with a clean cloth. Trains with two working locos did climb a spiral on the layout. Have said that, black scum did build up on the wheels that needed to be cleaned off. If allowed to build up to much, derailments were the order of the day. In recent times CRC 2-26 and INOX – MX3 are has been used, I understand both of these products are used in maintaining reliable operations of electrical equipment including railway signalling.
A local modeller just down the road, Gregg from Fishplate Films has done a couple of videos on tracking cleaning, very entraining and lots of information for consideration. Since watching Gregg videos a couple of years back I have been using INOX-MX3 on the track. I can go to the layout any time, and trains well run. Sometimes there may be a few weeks between turning on the power, trains still run. Cannot recall the last time I have had to cleaned wheels on rollingstock. Locos have their wheels cleaned when they are serviced from time to time.
I don’t think one method can be used on all layouts, I feel the location of the layout and the environment along with general weather conditions you live in, on the day will play a part in how your layout will run. Some products are good for a deep clean of the rail head, others help with the flow of power to the locomotive. Some will be good in some applications and not so good in others. And then there is your style of train operations, long trains winding up grades to short trains on a flat shelf layout. Some locos may be fitted with traction types and other are not, some solvents may cause damage to them.
Recently, I was given an article published in the NMRA Magazine “Track Dirt Science” written by Paul Welsh. The article covered everything from sludge accumulation, rail tarnish, rail scratches, wheel scouring, know your enemy, Wet and Dry rail philosophy, track cleaning cars, cleaning wheels, cleaning solvents volatility, effects of solvents on locomotive adhesion down to having a scientific dirt management program.
Several years back I did
purchase a Centerline track cleaning car for the standard gauge section of the
layout and have never used it, I think at the time of purchase it cost around a
$100.00. The question I keep asking myself, what’s the best practice for using
this car and I kept coming up with different answers.


Gwydir Valley Models (Glen Inners NSW)
website show the following Centerline products:-
Rail Cleaners in “N”, “H0-3”, and “H0”. Replacement knurled brass rollers, elastic bands and roller covers. http://www.gwydirvalleymodels.com/
The “Track Dirt Science” article shows how to build a number of tracking cleaning car. This was another matter I have been tossing around for years for the H0n3½ QR network on the layout. What wagon can I built and how to fix a pad that rubs on the railhead.
Thanks Craig for the
article, hear go. Some time back Craig had a number of knurled rollers made by
a relative, much the same size as the Centerline roller car. I purchased two of
them to do something with one day. After
purchasing the rollers I did make one car for them using styrene, after it sat
around on the bench for a few months it started to bow. That’s a bugger
@@###$$%^. I think too many alteration and to much solvent may have contributed
to the bow.

After reading the article a number of times I decided to build three cars changing my construction method. The article shows three different types of blocks/pads being used to clean the track.
My cars were built from
styrene, sub end frames were joined using Evergreen strips to have an open pit
between the bogies.


Lead sheet was added to
each end to assist in keeping the wagon on the track.


One car was made for the
roller, a smaller opening in the centre.

A Chux “Superwipe” section
was cut into 26 mm wide strips. The strip was wrapped around the roller and
secured with a small strip of masking tape. A small rubber band will do the job
also. The masking tape didn’t stay in place for long once the solvent was added,
maybe, I should wrap the masking tape fully around the roller bring it back
onto its self??. If planning to run in one direction only, the Chux strip does
not require securing if the roller is placed in the car with the end of the
strip trailing. Spare Roller Covers are available from for Centerline track
cleaning car as well if you don’t like the idea of making your own.

Another part of the project was to make homemade decals with my jet ink printer.

The second car was make
to take timber block, fitted with Chux “Superwipe” strip the same dimensions as
the roller. The pad can be used wet with
cleaning fluid or dry same as the roller car.


The timber blocks were made from a stick of 42mm x 19mm dressed pine cut to be 25 mm wide. Not knowing how dirty the cleaning pads would end up, a number of extras were made with the saw in action. This would give me spares to change at any time without stopping to change cleaning pads. Two 19 mm foldback paper clips were secured to the top of the block with a screw to hold the Chux wipe strip into place. When adding the Chuck strip, a Masonite block (same size as below) was sandwiched onto the timber block, rough side down. The Chux “Superwipe” strip need to be tight on the block, if loose, you may find it will catch on points.


The third car with built
with a full centre pit that cleared the rail by a few millimetres to take Masonite
blocks.

A 25 mm strip was cut
from a 4.8 mm thick Masonite sheet. The strip was cut into small blocks 42 mm
long. When in the track cleaning car the
rough side goes down onto the track. The pit on the wagon will take a number of
blocks, this helps with a bit of weight to keep bottom block on the track.
Nothing new about this method, it has been around for years.


A number of pads were
also made from a paint edger pad, these were cut to size using heavy duty scissors,
25 mm wide by 42 mm long. The pads are 5mm thick and fits in the same car as
the Masonite blocks. Two refill pads in a pack are available from Bunning
hardware stores for under $8.00. Masonite blocks were added on top the paint
pad for weight and to keep the pad in place.


The blocks and pads can
be used on both the H0n3½ and H0 track systems.

For the first test run the train was set up with the paint pad in front of the loco (Car # 3) to clear dust etc. from the track.
Behind the loco was the roller car (Car # 1) with a few drops of INOX on the pad, followed by a car # 2 with a dry pad.
Below is the results
after four laps of the layout.


I also had a play around
with the H0 Centerline car, changing the bogies, the H0 Kadee bogies were
removed and replace them with Southern Rail H0n3½ bogies. The side mounting
lugs on the Kadee coupler were removed to allow the bogies to turn. The car
worked well on the layout coupled to the other track cleaning wagons.

For sidings I plan to use a push/pull, dry pad, roller with cleaning fluid, and a dry pad.
I guess only time will tell how well the method will work and how much time it will save me from cleaning track.
I would still like to
explore a method using prototype wagons with pads etc., fitted to the
underframe. Some time back I did try “clip on” wheel axle pads, these were
light (plastic), a small piece of lead sheet was added to the top, this did
improve things a little. They needed to be removed for cleaning and the whole thing
was a bit messy.

Noch # 60159 TT Track cleaners, there is 5 to a pack. Noch also make them for “N” and “H0” scale track. Woodlands Scenics make a H0 scale Dust Monkey that is very similar.
Well, that was issue # 100, I trust you find the information helpful for your railroad/railway/layout. Thank You for your all your support and comments, they are all appreciated. I look at the stats from time to time that Blogger provide, and the numbers and countries that view the blog are mind blowing considering QR is not a large rail network on the world stage.
It’s been a long time since I have done anything to the layout, like us with age, things start to fall apart. And there is the other side of the coin, modelling has improved so much in the last decade along with standard of modelling. Next time we will look at what’s happening on the layout. A little clue below.

Until next time, stay safe and enjoy your modelling.
Arthur H.
Acknowledgements.
NMRA Magazine “Track Dirt
Science” by Paul Welsh.