Last week my two packs of SDS/CGL PCO wagons arrived in the mail. I ordered PCO wagons as they entered service fitted with buffers and ran on the QR network with them on for a number of years.

PCO, PCOP, PCOY, PCUY wagons were one of the most versatile container wagons on the QR network. They could be found in all corners of the state, in all types of traffic. Many were allowed to specific traffic, sugar, bitumen, gypsum, coal, fuel, pipes, steel, spoil, cattle, to name a few. The wagons could be found on trains in one or twos, and anything up to a full train. The first test train for 100 km/h running on the NCL used PCOY wagons. As part of the NCL 100 km/h project all contracts and classes were grouped into one, the PCUY class. The class entered service as container traffic was exploding in both overseas and domestic markets. Gross mass of containers was increasing as well their overall height. Most of QR container fleet at the time were converted flat/platform wagons and were very limited in what they could carry.
The PCO wagons were designed around carrying two (2) 20 ft. containers with a gross mass of 24 tonnes or one 40 ft container with a lower floor profile. Other length containers with 20 ft mounts could also be carried if required. SDS and the CGL website cover the prototype information in more detail.
SDS_Models (sdsmodels.com.au).
http://www.cglmodels.com.au/pco-pcuy.aspx.
The website also shows the main characteristic that went into the construction of the models. Being a medium length wagon, they will look at home on any layout. After the usual inspections, buffers were added along with a few containers, and then to the layout for a run.


Up until the mid-1990’s, only one bogie on a wagon was fitted with VTA brake change over valve (loaded/empty detection). Instructions were issued that when wagons were loaded with one container, the container was to be loaded over the hand brake wheel. This avoided heavy braking of the wagon and flat wheels. With the 100km/h NCL project and newer wagons, loading sensing devices were fitted to both bogies.

One bogie on the model as per the prototype is fitted with a VTA brake change over valve. The bogie side frames carries the same markings as the prototype QR 38 bogies. Brake blocks and shoes are also part of the bogie. On the track they run freely, if the layout has any ups or downs, the wagon simply roll away.
The
wagons are fitted with adjustable coupler boxes. The wagon comes with the
coupler set for H0, that is, the coupler centre is 9.92 mm above the rail. QR
plans for more modern wagons show coupling height around 787/9 when loaded. In
some cases, on container wagons, it is lower. Empty wagons are shown around 830
mm. In H0 terms that is 9.04 mm loaded and 9.5 mm when empty. Us modellers who
model older timber wagons, the drawhook is centred at 2ft. 8ins above the rail,
or for H0 modellers that is 9.33 mm. The coupler box on the PCO wagons have a
plate within the coupler box that can be changed to the top of the coupling
shaft, reducing the coupler down to 9.32 mm above track level. If the .6 of a millimeter effect your operations, changing the coupler height is quick and easy. I did
one to see what the difference was, the rest was left alone.

Changing the coupler height, the coupling trip pin will also require adjustment so it will not foul the top of the rail. On the prototype anything up to half a couple jaw was acceptable for traffic. Plus, on the prototype there are differences with in the class, there is loaded and empty wagons fitted with new wheels and last turning wheels. It can add up to quite a bit resulting with various coupling heights across the entire train.

Marking
on the wagon is what dreams are made of, it all there to the correct size and
readable. Builder’s plates, axle test dates, brake service information,
reflector, handbrake on/off with arrows, drawgrear class, length, tare and carry
loads for all lines.

Mounting Containers. Over
the years there has been various manufactures of H0 containers, each have their
own method of securing the container to the wagon.

Walthers
Tank Container (kits) has pins mounted to the bottom frame to secure the
container to the wagon. I guess this requires holes in the floor of the wagon. (I
assembled five of these kits, only the last one was done correctly ???)

Lima Container.

SDS Container. Recess slots in the corner for mounting container on wagons fitted with twistlocks. (I think twistlocks on the floor of an empty wagon looks much better than holes in the floor).
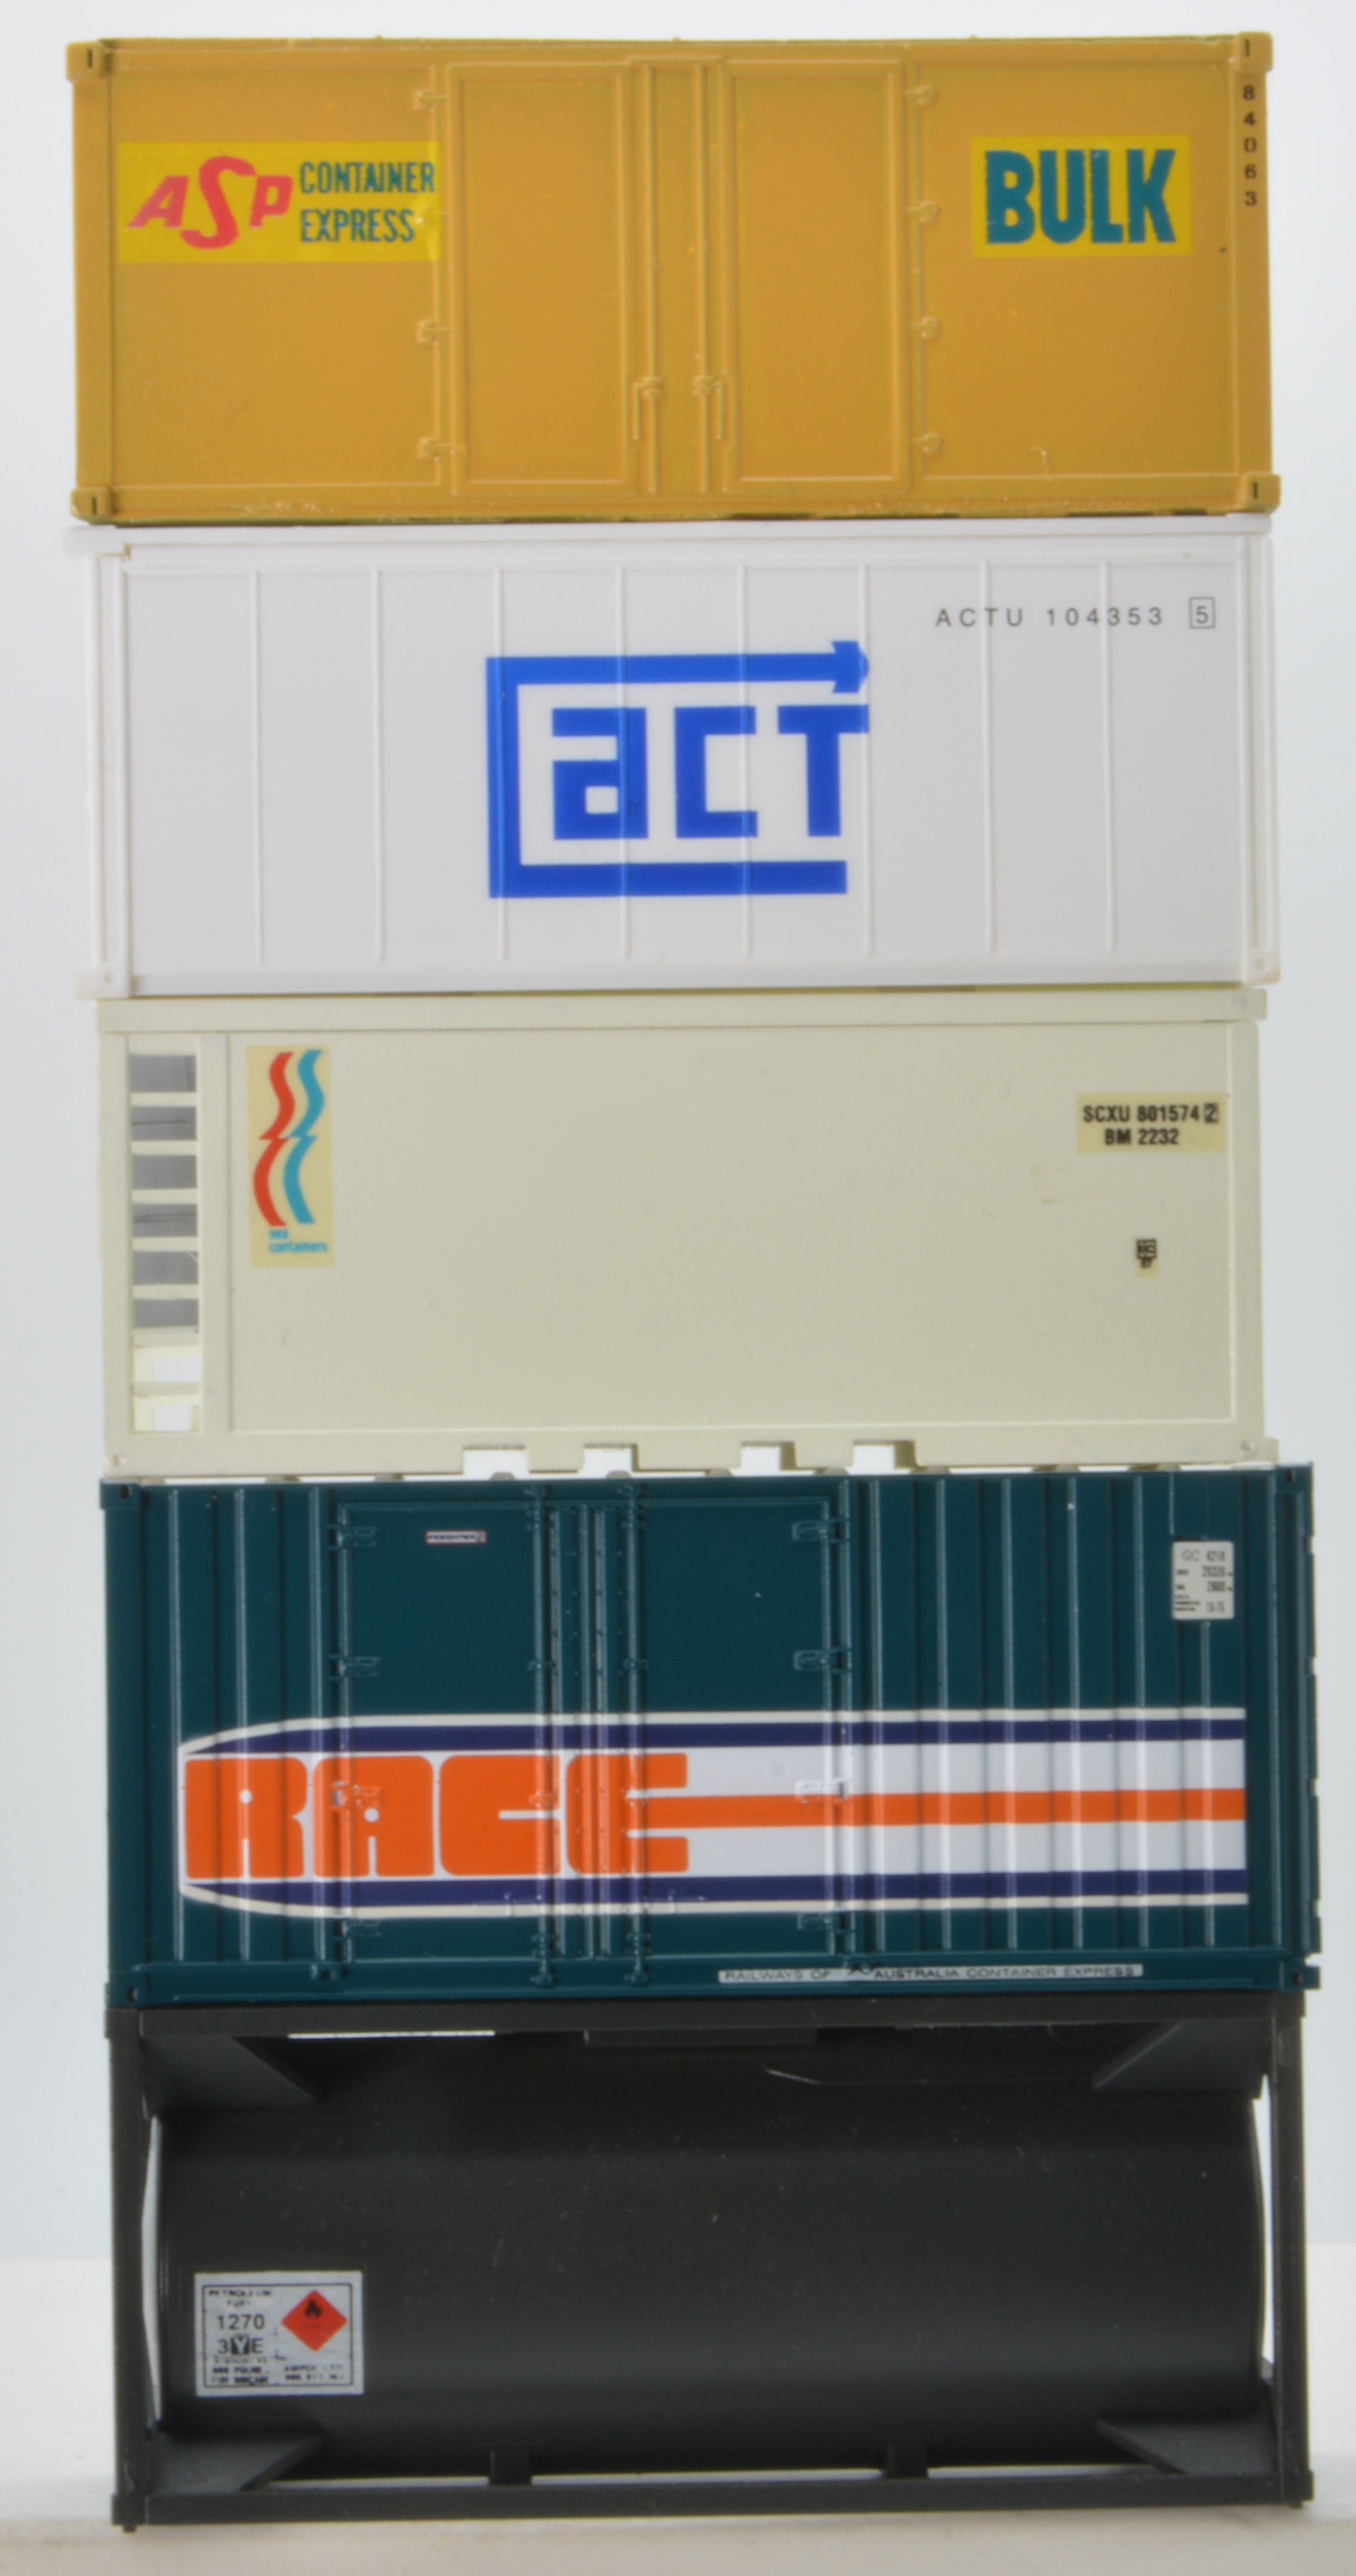
Not all 20 ft. model containers are the same size. Some
scale out as 19 ft long.
The prototype PCO wagon has spigots on the ends and retractable twistlocks in the centre of the wagon. The wagon has been modelled with uniform container mounting heads of the twistlock type to make it easy for us modellers. A plus for modelling container wagons is the containers can be changed and swapped around with various loading figurations. No two running sessions need to be the same. Over the years I have collected containers from buy & sells, purchased them on sale, scratch built a few etc. etc. Yes, my container fleet is a box of all sorts as is my container wagon fleet for both QR and NSWR networks.
I have found the wagon fixing points plays a big part in what container goes where. At the end of the day, we do need to match the prototype, or it will not look right. On a PCO/PCUY wagons, the containers are mounted in the centre of the wagon, the two containers butt up together in the centre of the wagon, there is no gap between them. Older under scale in length containers on this type of wagon are not going to cut it.
SDS containers have recess slots in the container corner casting that fit straight on. The Walthers containers I cut the pin off the bottom of the container and was able to drill one (1) mm mounting holes in the corners. Other containers I used a motor tool, (Dremel) with a small engraving burr on a low speed to make slots in the corner, likewise for longer containers that protrude beyond the centre of the wagon. Slots was cut out to allow the centre twistlock to fit under the container frame. Cutting the twistlocks off the wagon floor will restrict what one does down the track.

This SDS 40 ft container fits over the centre twistlocks without the need to make any modifications.
I have skipped over quite a few things, there is much more that could be added. In summing up, an awesome wagon with detail that was just a pipe dream for many of us. The wagon will be at home on any layout where the modeller is wanting container trains and a must for modellers who model the mid 1980’s onwards. Well done guys, I take my hat off, an awesome model.
They say a picture is a thousand words and I’m not much good at either, I guess the proof is in the pudding. So, I have attempted to do a YouTube video of the wagons on the layout where you can see them in action as they are put to the Westgate SWR test.
The
only issue for me is what I do with the ten I added to the layout in January
2019.
http://westgateswr.blogspot.com/2019/01/pcuy-wagons.html. I guess they will make one more trip, and that’s to the rubbish bin. More prototype information on the class is available on the site as well.
Sunday afternoon I’m on roster to be at the Pine Rivers Model Train and Hobby Show, Cribb Rd, Brendale on the NMRA stand doing some scratch building. Be sure to drop by and have a chat.
Happy
modelling, stay safe and well to next time.
Arthur
H.
No comments:
Post a Comment