With the layout just about completed, a method of operations was needed. The layout is two modules 1400 mm x 400 mm, not that big. It was to be something simple, give flexibility and reflex the prototype. It needed to be something easy to understand and not a lot of paper work. The things I find hard when going to another layout for operations is identifying locations of stations and classes of wagons. You read that wagon XYZ1234 is to go to Timbuktu. Some wagon numbers are small. QR wagon class and numbers are three inches high, in HO that’s just under 1 mm. Given my age and the age of my mates, small numbers are hard to read. Not everyone is a full bottle on wagon classes making identification of the wagon difficult. Being a small layout the location to place (spot) the wagon is an industry, a building that suggests what type of business is being conducted at the location. A fuel depot is the place for petrol tank wagons or wagons loaded with drums. Something that reflects the prototype operations was required.

The paper based system
used by QR before computer required a label to be fixed to both ends of the
wagon. The red circle shows the label.


Given the layout is a
standalone one, nothing leaves the layout all that is required is the Consignee
(Business/person receiving the goods) and a wagon number to identify the wagon.
To give realism I used the full label.

Station
from can be any station
on the network, Roma Street is a good choice for general goods. Some others
could be, the Golden Fleece terminal was at Whinstanes, GMH for Holden cars came
from Acacia Ridge etc.
Consignee,
this wagon contains a
load of farm machinery, this needs to be someone who sells this type of equipment,
Amby Tractors was used.
Station
to, is Amby West, the
location name of the layout.
Wagon No. is the number on the wagon, given the wagon number on the wagon is small and hard to read, plus some operators may not know QR wagon classes, a picture was added to the label to help identify the correct wagon. Train No. and Date is not required. 10 was added to the tonnes as the weight of the load in the wagon. At this point it’s not required. At a later date if trains were made up as the prototype using weights and lengths this information would be required. On the layout there is no siding for Amby Tractors, the wagon needs to be placed in a public / common siding with facilities that can unload the wagon. In this case a crane with lifting capacity is needed. The label was endorsed O/H Crane, the farm plant can be lifted out of the wagon onto a truck to be delivered to Amby Tractors.
For easy handling the labels were laminated. A styrene holder that clips onto the front of the layout was made to store labels once the wagon are placed in the correct siding. This makes them available for the next out bound train. All up there is 29 wagons on the layout and a label was made for each wagon. Empty wagons going to a stations as part of orders have a label, this was to indicator the wagon was required at that station. As much as possible no two wagons the same were used, except open wagons and they could be identify by the load. As we look at the each of the sidings on the layout I will highlight more information. Before each session the labels can be shuffled to mix them up into a different order.
Labels are also used to
move wagons around the yard. From time to time wagons that arrive loaded in for
one customer departs loaded by a different customer. The wagon is moved from
one siding to another during a shunt move when a shunt engine is in town.

I have a couple of departmental wagons, the water wagon is to supply water to the cattle yards and a wagon of sleepers for local fettling gang working in the yard. Looking at the location of these two wagons on the layout it would make more sense to reverse their location, but that would make it to easy, the method in the madness is to make one think. If the ordinary train label is picked up at the same time as Yard Shunt card, the wagon is placed as per the Yard Shunt card first and after the other wagons have been picked up and attached to the train, the departmental wagon is picked up as the last move and added to the departing train.

The fettling gang is Andian Figures.


A card was made up in “Word” for each session or train to shunt. Each session, or shift if you like needs to flow from one to the next. What’s on the layout stays on the layout, there is no other sections for the train to travel too. All wagons on the layout can be accommodated in the sidings leaving the engine and van standing at the station. Each shift is a different scenario and requires a different approach.
Top of the card identify the layout, a logo is something I’m planning to do, take one using a photo from the internet. Instruction for the shift is added to the bottom section of the card. The card was laminated same as the labels.
Trains at a station can do a number of different types of operations. Most larger stations had a shunt engine to break up trains, place wagons for customers, pick up wagons and marshal trains. Shift 1 is to make up a train in the UP direction, collect eight (8) wagon labels. The label may carry instructions where some of the wagons needs to go on the train. Other than this, the wagons can go in any order, if this become too easy over time, dangerous goods marshalling can be added. Or wagons go on the train in the order picked from the box.
The last shift can be to just place the wagons on the train at the platform in their respective sidings. To make the shunt a bit more complex instructions like livestock wagons must be given high priority and be placed first. Tank wagons (bombs) could also be included in the instructions.
Shunt trains on the network go back and forward up and down the line, other may turn around and go back from a particular station on the network. All of this can be made a shift, endless scenario can be made.
A train arriving could detach (drop off) 4 wagons from the lead for the train, place the wagons in their respective siding and attach (pick up) 2 wagons as per instructions on the label. The train continues in the same direction.
The next train could be a terminating train, arriving as an UP train travelling north and returns as a DOWN train returning south. The train may be required to place all wagons on the train in sidings as shown on the label and pick up the same number of wagons for the trip south. Or the train may have carried out shunting at other stations on the journey up, so some wagons arriving need to go back on the train. The number of wagons to be dropped off and picked up can differ from shift to shift. The combinations are endless.
Each shift may take around 15 to 20 to minutes to complete. The more you do the quicker it becomes. How one goes about it is their call, there is no right or wrong way to go about it. One way may be quicker than the other. I’m sure if you were a QR shunt crew you would be looking for the shortest and fastest way to do the job. You can place all wagons off the train first and then set about collecting the wagons to make up the train, this could be the long way. Shunter can do the job with their feet (the long way) or take a minute to think about it. The smart way is when you go to a siding to drop off wagons, you do the pick-ups (attaches) at the same time. Given there is limited room on the layout another smart move could be to place wagons in sidings that don’t have any attaches (pick up) first. Siding on the layout run in two (2) directions, some run off the front of the engine, others run off the rear of the engine. It may work out best to shunt the sidings in one direction and then shunt the sidings in the other direction. In other words, shunt the siding on the rear of the engine and then the siding on the front of the engine. Knowing what fits where can reduce double moves. Sizing up what you have on the engine and the room that is available is very valuable. As they say, time is money.
Let’s look at each of the
sidings and the wagons allocated to them. The layout is about 95% completed,
just waiting for some figures to arrive which will add to the story. At first I
was planning on using all eight wheeled wagons as they perform much better than
four wheelers when it comes to shunting. But, eight wheelers take up more room
on the layout. I have gone for a mix of both, some of the four wheelers have
some weight in them which will help to keep them on the track, plus the trains
are not that long. A mix of four and eight wheelers will look much better and
will reflex an era up to the mid 1980’s.

Butter Factory.


The scene is
set with a flicking fire in the boiler house, lighting, milk cans and cartons
on the loading platform, a local framer has just dropped of his milk. The building
is a Quick B 811 kit with some added bits, more information can be found in April
2024 blog posting.

Wagons
allocated are an ABG four wheeled butter wagon and a CMB eight wheeled butter
wagon

ABG wagon is a Caintode Flats kit
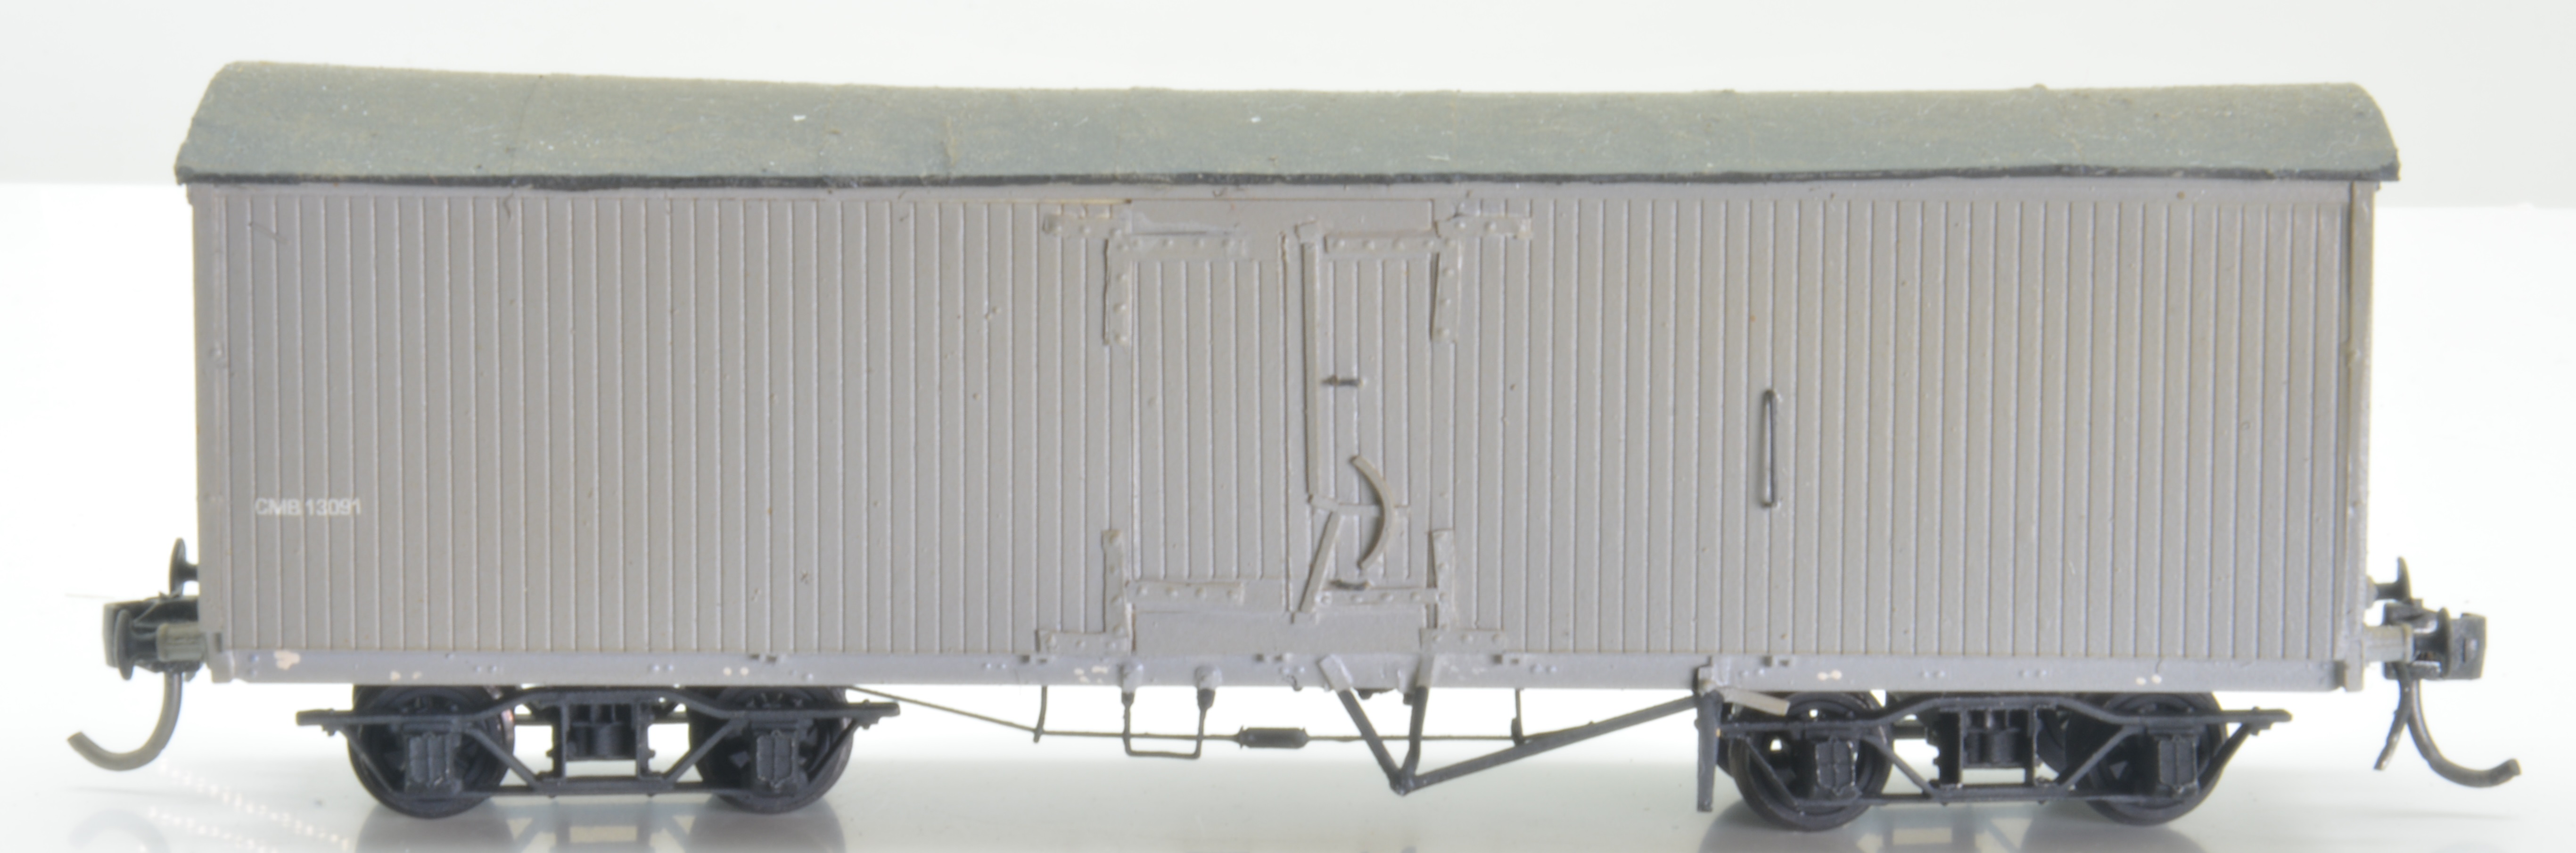
CMB wagon is scratch built with Caintode Flats bogies, buffers and brake cylinder.
Other wagons could be box wagons for packaging arriving etc. and a small wagon of coal for the boiler house. One of the yard shunts is to place the ALY four wheeler steel louvered box wagon from the Goods Shed to the siding.
Goods Shed.

The Goods Shed is scratch
built, the crane is a Caintode Flats kit. Four wagons have be allocated to this
siding. Two four wheeled box wagons and two four wheeled open wagons. Wagons
loaded in Goods Sheds are mostly wagons with various small consignments for
various customers including the general public. Often they contain goods for
more than one station. These wagons are called “Road Wagons”, they are unload
enroute on the train by the Guard and station staff if on duty. They are
usually marshalled next to the Guards Van on the train. The labels for these
wagon have that instruction. More on
Goods Sheds can be located in November 2024 blog posting.
Choke blocks have been installed on all siding as per the prototype, unlike the prototype to derail runaway wagons, these are clearance point markers


The two tarped FG open wagons and the BG box wagon is scratch build using Caintode Flats bogies, buffers and brake cylinder.

The longest siding on the
layout has three industries. On the stop blocks is the Queensland Fruitgrowers
Society’s (QFS) shed. The building of structure can be found in April 2025 blog
posting.


Two wagons have been allocated to this traffic.

Chivers fine scale
kit, a two door ALG wagon. The roof has been modified.

26 ft. “H” wagon is scratch build with Caintode Flats bogies, buffers and brake cylinder.
Another part of the QFS
operations is the Cold Stores facilities.

Two more wagons have been allocated to this traffic.

CMIS wagon is a 3ft 6 Models kit.

CMI wagons is scratch build with Caintode Flats bogies, buffers and brake cylinder.
Next to the Cold Stores is Amby Motors,
where is no siding for the company, they use departmental facilities.

Overhead Crane.
Before the level crossing is a departmental overhead crane. Details on the building of the carne can be found in May 2025 blog.

Two loaded “H” wagons have been allocated.


Both wagon is scratch build with Caintode Flats bogies, buffers and brake cylinder.
Departmental
Sidings. Most stations
have sidings that was used by everyone, members of the public etc. The layout
has two sidings. The first is the Ramp Road, as the name suggest the siding has
a side loading ramp for loading vehicles etc. The ramp only takes up some of
the siding leaving room for other traffic.

The ramp is about 30ft.
long, the length of one eight wheeled wagon. Five wagons fit into the siding.

A truck load of
wool marks the spot for an empty HJS wagon.

This wagon is a modified Wuiske HJS kit, Canitode flats QR 4 bogies have been fitted to make the wagon a red circle fast freight wagon.

The drums are Tichy Train Group models.

On the ramp for unloading is an SMS wagon for the local garage. The wagons is scratch build using Caintode Flats bogies, buffers and brake cylinder. The EH Holden is a "Road Ragers" model R.074.


Not all fuel
depots have depot siding to unload their fuel, some depots could be a block or
two away from the railway line. A pipeline connects the railway with the depot.
Here there is a pit to couple the wagon to the pipeline.

A small shed
has been provided to store hoses etc. to aid with the unloading of the tank
wagon and helps mark the location.

The wagon is
scratch build using FNH bogies, and Caintode Flats buffers and brake cylinder.


YK cattle
wagon, scratch build using Caintode Flats bogies, buffers and brake cylinder.

NM wagon of
sheep, scratch build using Caintode Flats bogies, buffers and brake cylinder.

An empty UR wagon not required is stowed in the siding. The wagon is scratch build using FNH bogies, and Caintode Flats buffers and brake cylinder
Also stored in
the siding is a wagon of departmental sleepers waiting for the local track
ganger to unload.

This wagon is a Chivers Fine Scale kit.
A wagon of
bitumen has arrived for the local council and a spray track marks the spot for
this wagon.

The bitumen
truck is a Ford fuel tanker that was modified.

The wagon is
scratch build using Caintode Flats bogies, buffers and brake cylinder.
Golden Fleece fuel depot.


OP 1 is a Caintode Flats kit that has been modified. The wagon is fitted with FNH brass bogies.

OP 13 is
scratch build using Caintode Flats bogies, buffers and brake cylinder.

The FG wagon is scratch build using Caintode Flats bogies, buffers and brake cylinder. The 44 gallon drums are from Infront models.
Flour Mill. The mill is scratch build, more on the mill can be found in June 2024 blog posting.


WHE wagon of
grain for the silos. This is a PGC kit.

For loading flour, a C wagon has been supplied. The wagon is a Caintode Flats kits All decal on the wagons are available from Ted’s Decals in Toowoomba. (teditor@bigpond.com). You can also find them on EBay.
These is a couple of departmental wagons
hanging around in the yard as well, most yards had them and they just keep
getting in the way of operations.


A FFW water wagon, this wagon is on hand to water the cattle yards. The wagon needs to go to the yards when stock are in the yards. This is one of the yard shunts. The wagon was scratch built.

Road side tanks and pump marks the watering location. When water is required, (a lucky dip found in the label box), other wagon may need to be moved and put back to accomplish this requirement.
Both wagons have been shoved around the yard and stored in the shunt head near the flour mill.
Yes, we have all these cards/labels, how do we manage them.

For the wagon labels a styrene holder was made and clips over the front Perspex fascia.
A second holder was make for the
instruction cards. The front of the holder displays the shift card.


Likewise
another smaller shelf displays the labels for the wagons being picked up. The yard
placements instructions are not need. Wagons can be attached to the train in
any other except some cards may have instructions, i.e. the Road Wagons are to
be marshalled on the van.

All trains require a locomotive and my era a Guards Van too. Currently a 60 ton locomotive is working the layout. A Wuiske 1720 class with some weathering.

The Guards Van
is a BBV van, now available from JH Models as a kit.

These two vehicle will change from time
to time. There is no labels for them.

To fill the real estate between a couple of the siding and old house with junk was built.
Only two sidings are listed as private sidings, the flour mill and the Golden Fleece fuel depot. This makes all other siding available for all shunting moves.
All trains start and finish with the Guards Van on the platform at the station.
Uncoupling Tools.
Uncoupling the wagons is where most derailment occur. Some wagons don’t have a lot of weight in them and they lift off the track when the coupling don’t let go. I can see why some operator’s weight there wagons to the hills for this type of running. Being half blind and with shaking hands doesn’t help.
For some time I have been using bamboo skewers with a wall plug on the top for extra grip. They come in various sizes and lengths. The point on the end is not the best on some of them.


Of late I have been using Interdental dental Brushes, two sizes have been tried. No. 3 yellow handle and a No 5 blue handle. The handle can be extended with a length of tube. The yellow brush being the smallest and bends from time to time. The blue brush is a bit stronger and works the best.

For
parts of the layout in poor light or night time operations, your tool of choice
can be fixed to a rechargeable pen light, EBay has a few to pick from.

Closing
Summary.
Operations on the layout hooks you in, before you know it, an hour or two has passed. It may not be the biggest layout in the country, but it’s packed full of fun and enjoyment and makes you think about what you are doing..
Trust the information will lead you into something different in the model railway world and helps in finding a new dimension to explore and enjoy.
Until next time enjoy the hobby.
Arthur H.
PS. Some more photos
during construction.

Please excuse
my messy book shelf in the background. Instructions have been issued “Clean up
your mess”. Yes Dear, it has been done.

Tabs (aluminium strip) attached to the frame on the end are used for aligning the two modules. The frame is 1” sq. aluminium tube and joined with plastic connectors. All up the cost was $108.00 from a local aluminium supplier who cuts it up for you. Legs were made to fold up for storage and transportation. Thinking about the leg support brackets, these would have been better on the back, not on the front. 7mm ply was glued and riveted to the frame. Make sure to check where the track will be. Track was laid straight onto the ply. The layout is 810 mm high, making it great to sit and work from a chair. The two modules are 1400 x 400mm, made to fit into the car.

Wire in tube method was used to control points from the front fascia. Lever switches changes the power for the vee. There is only one DC power district for the layout. Each length of track has a dropper to the power supply, siding can be separated if that was required in the future. A 50mm removable joining track is used to join the two modules. A lighting bus on a separate power supply is used for the buildings, each build is connected to the bus with push in plugs so the building can be removed to transport the layout.


2mm clear
Perspex was added to the front and ends.


NMRA Board
meeting down under. Two gentlemen standing are from Mini Prints and the Station
Master came from Andian Models.